Today marks a significant milestone for Proxed.AI as we introduce full support for Google AI's Gemini models. This integration brings Google's cutting-edge AI capabilities to our platform while maintaining the same robust security and developer experience you expect.
#
Why Google AI?
Google's Gemini models represent some of the most advanced AI technology available today:
- Gemini 2.5 Pro: State-of-the-art reasoning with enhanced capabilities
- Gemini 2.5 Flash: Exceptional price-performance ratio for production workloads
- Multimodal Support: Native vision, PDF, and text processing capabilities
- Flexible Context Windows: Up to 1M tokens for complex tasks
By adding Google AI to our platform alongside OpenAI and Anthropic, we're giving developers true choice and flexibility in their AI stack.
#
Seamless Integration, Same Security
The beauty of our Google AI integration is that it works exactly like our existing providers. Your applications get:
- Unified API Interface: Same endpoints, same authentication, different provider
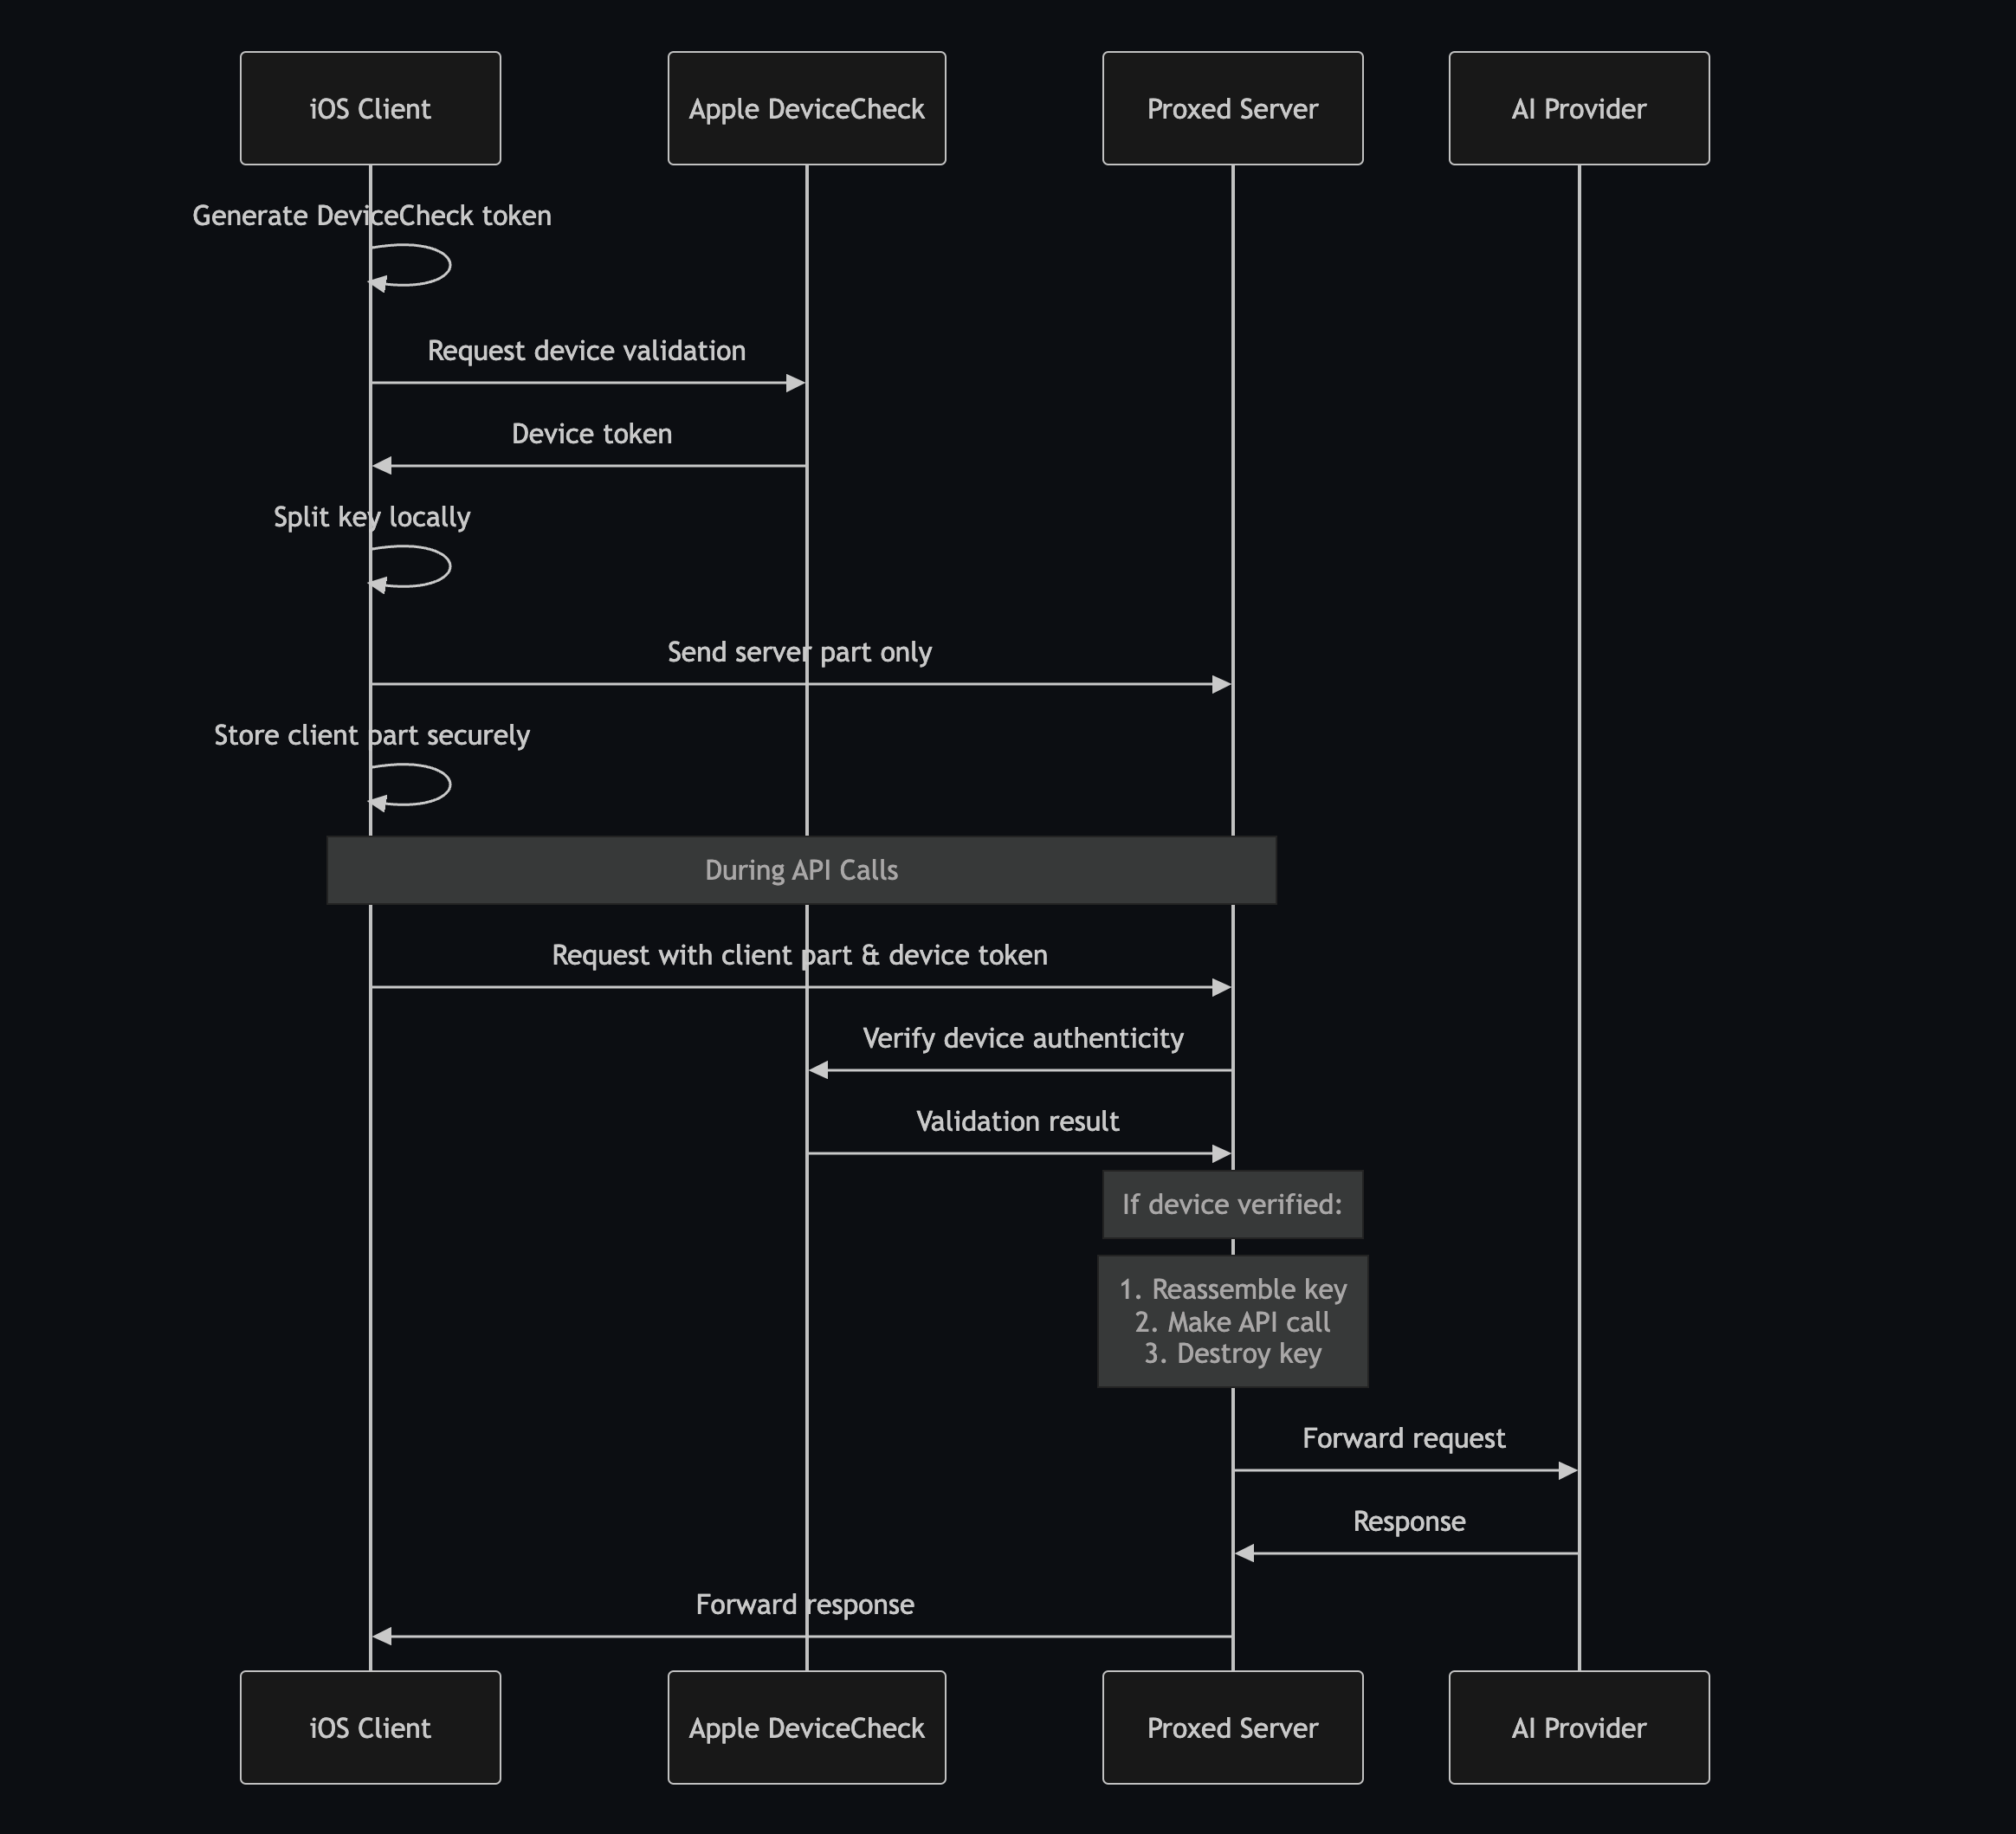
- DeviceCheck Protection: Hardware-level iOS device verification
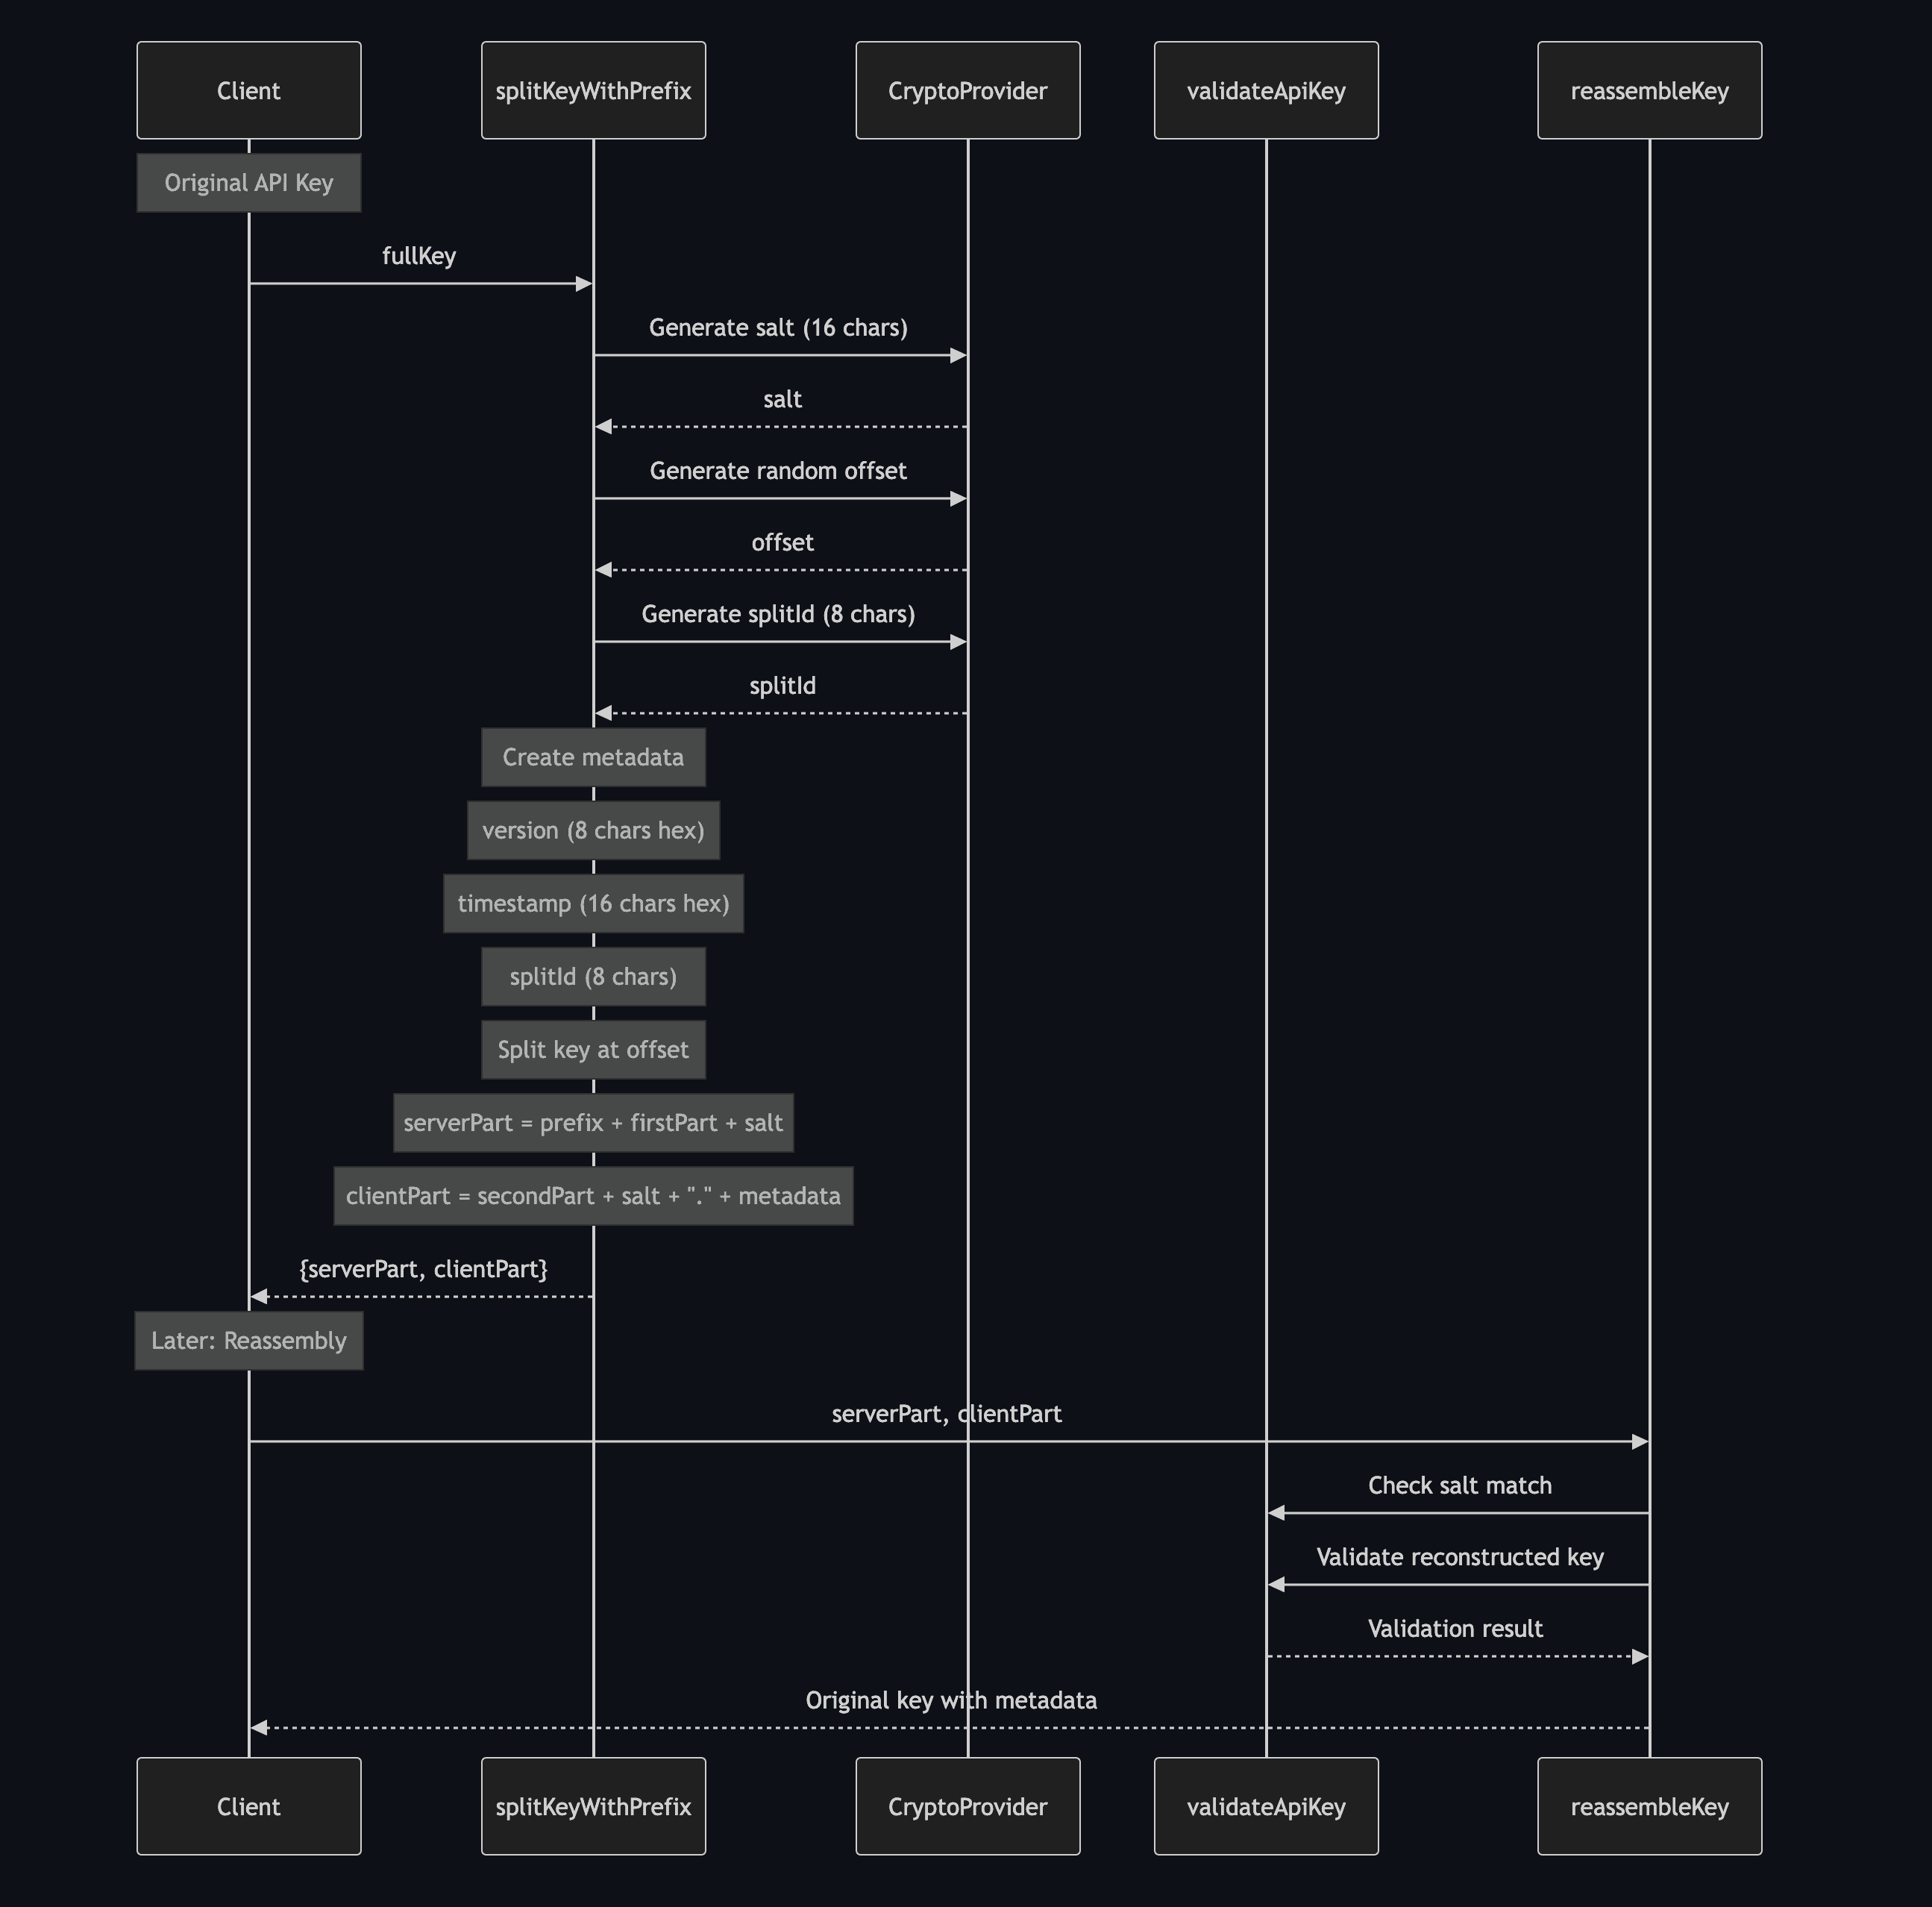
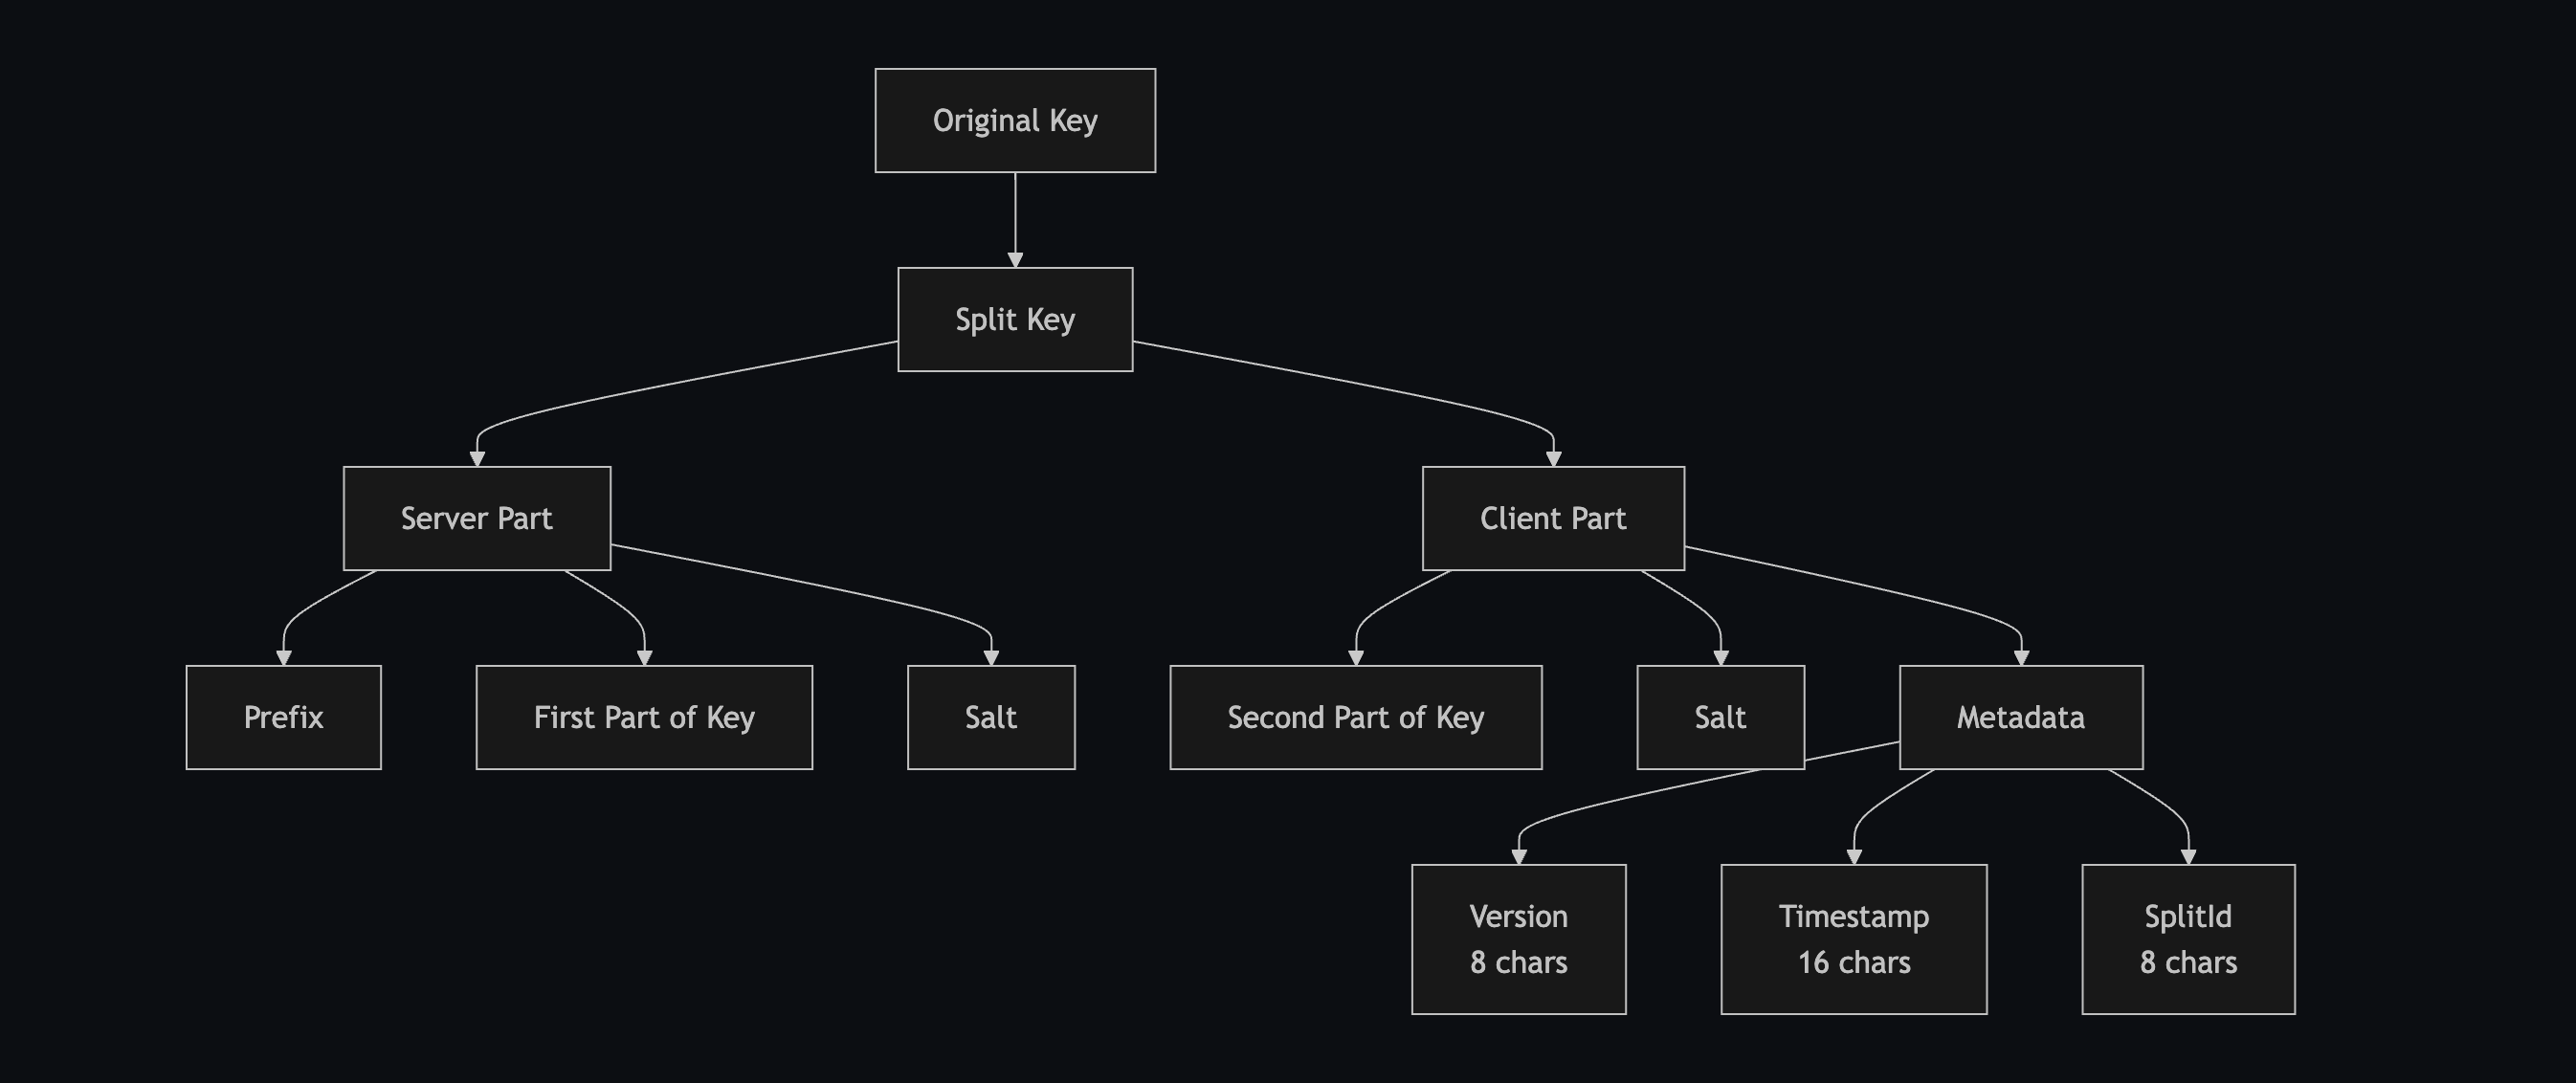
- Partial Key Management: Split-key architecture keeps your Google AI keys secure
- Structured Responses: Visual Schema Builder works seamlessly with Gemini models
#
Getting Started with Google AI
#
Step 1: Add Your Google AI Key
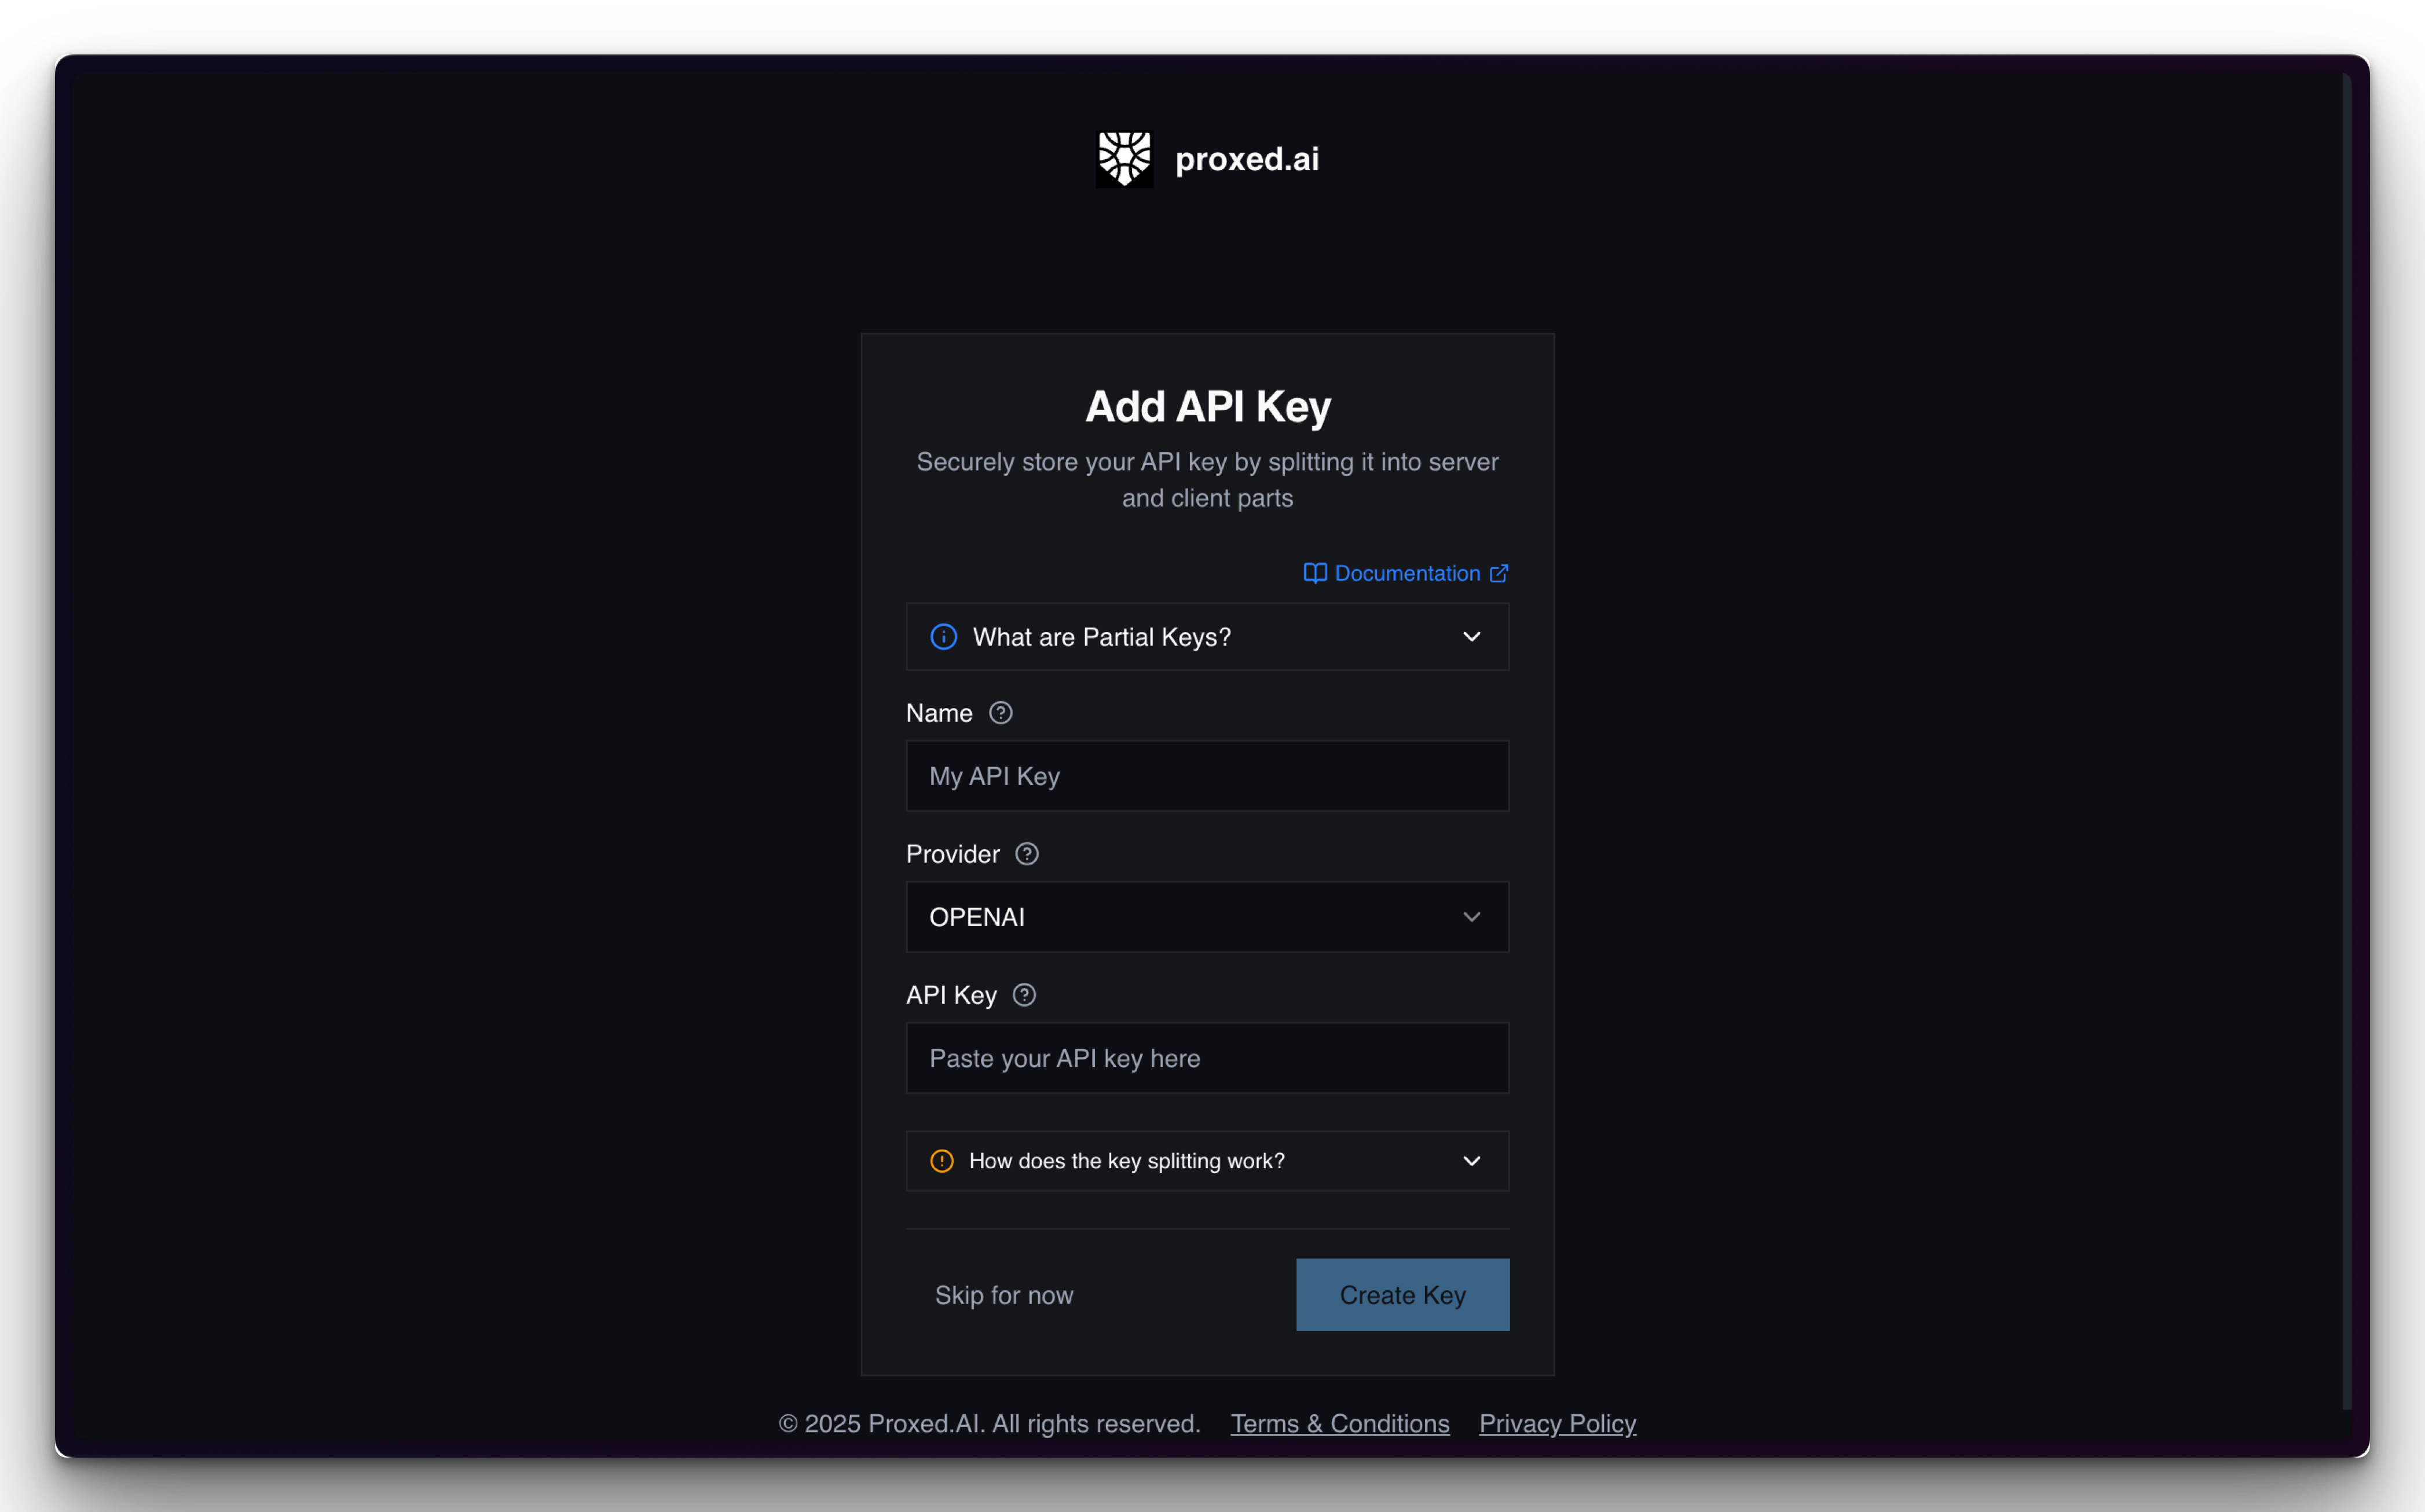
First, obtain an API key from Google AI Studio. Then add it to your Proxed account:
- Navigate to your team's API Keys section
- Click "Add API Key"
- Select "Google" as the provider
- Paste your Google AI key
- Our system will automatically split the key for security
#
Step 2: Create or Update a Project
You can either create a new project or update an existing one:
const PROJECT_ID = "your-project-id";
const GOOGLE_CLIENT_KEY = "your-partial-key";
#
Step 3: Make Your First Request
Here's a simple example using the chat completion endpoint:
let url = URL(string: "https://api.proxed.ai/v1/google/\(projectId)/models/gemini-pro:generateContent")!
var request = URLRequest(url: url)
request.httpMethod = "POST"
request.setValue("application/json", forHTTPHeaderField: "Content-Type")
request.setValue("Bearer \(partialKey).\(deviceToken)", forHTTPHeaderField: "Authorization")

let requestBody = [
    "contents": [[
        "parts": [[
            "text": "Explain quantum computing in simple terms"
        ]]
    ]]
]

request.httpBody = try JSONEncoder().encode(requestBody)
let (data, _) = try await URLSession.shared.data(for: request)
#
Structured Responses with Gemini
Our structured response endpoints work flawlessly with Google AI models. Whether you're analyzing text, images, or PDFs, Gemini models deliver consistent, schema-validated results.
#
Text Analysis Example
const response = await fetch(`https://api.proxed.ai/v1/text/${PROJECT_ID}`, {
method: 'POST',
headers: {
'Authorization': `Bearer ${GOOGLE_CLIENT_KEY}`,
'Content-Type': 'application/json'
},
body: JSON.stringify({
text: "Analyze this customer feedback and extract sentiment..."
})
});
const structuredData = await response.json();
#
Vision Analysis with Gemini
Gemini's multimodal capabilities shine when processing images:
const response = await fetch(`https://api.proxed.ai/v1/vision/${PROJECT_ID}`, {
    method: 'POST',
    headers: {
        'Authorization': `Bearer ${GOOGLE_CLIENT_KEY}`,
        'Content-Type': 'application/json'
    },
    body: JSON.stringify({
        image: "data:image/png;base64,..."
    })
});
#
Model Selection Guide
Choosing the right Gemini model depends on your use case:
| Model | Best For | Speed | Cost |
|-------|----------|-------|------|
| gemini-2.5-pro | Complex reasoning, nuanced tasks | Slower | Higher |
| gemini-2.5-flash | General purpose, production workloads | Fast | Balanced |
| gemini-2.0-flash | Cost-sensitive applications | Very Fast | Lower |
| gemini-1.5-pro | Stable, proven performance | Moderate | Moderate |
#
Advanced Features
#
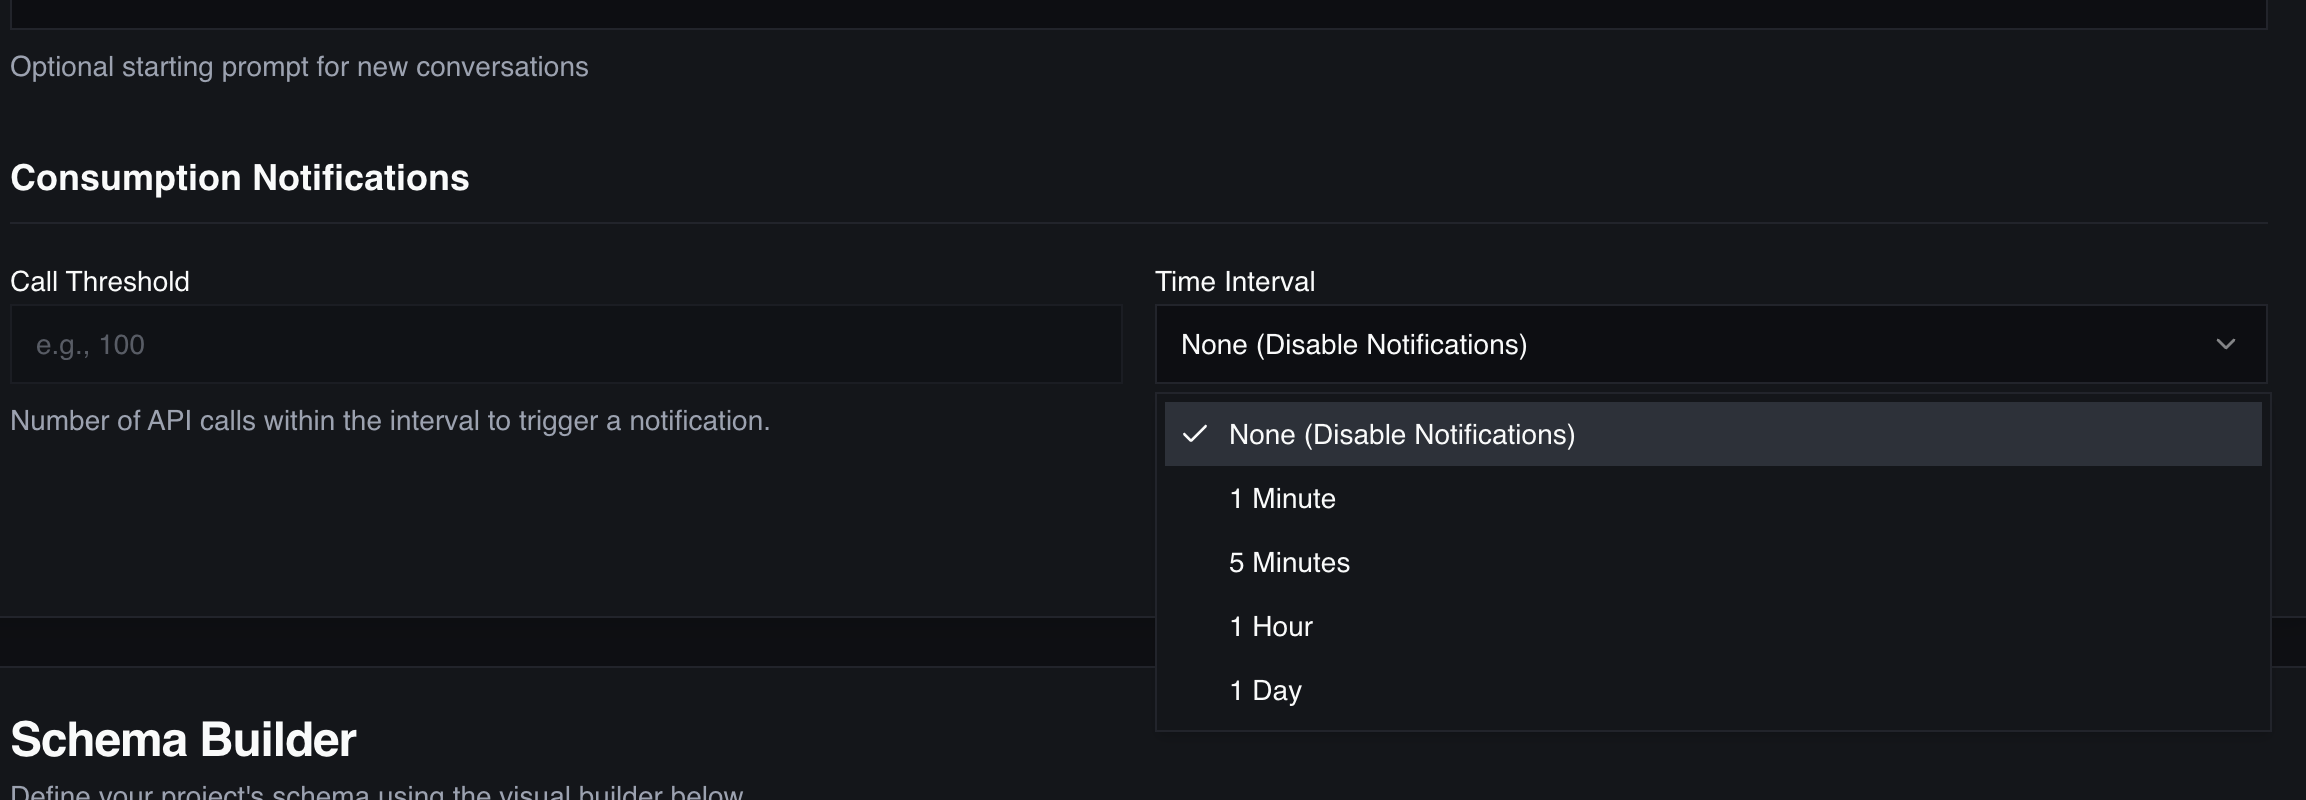
Context-Aware Pricing
Our platform automatically tracks token usage and calculates costs based on Google's pricing tiers:
- Different rates for short vs. long context windows
- Accurate multimodal token counting
- Real-time cost monitoring in your dashboard
#
Smart Model Validation
We validate model capabilities before processing:
{
"error": "Model gemini-embedding-exp does not support vision inputs",
"code": "VALIDATION_ERROR"
}
#
Provider Switching
Switch between providers with a single configuration change:
const openai = createAIClient('OPENAI', OPENAI_KEY);
const google = createAIClient('GOOGLE', GOOGLE_KEY);
Based on our testing, here's what to expect:
- Latency: Gemini 2.5 Flash averages 300-500ms for simple requests
- Throughput: Handles concurrent requests efficiently with our circuit breaker protection
- Reliability: Automatic retries and fallback handling ensure consistent uptime
#
What's Next?
This Google AI integration is just the beginning. We're working on:
- Model-specific optimizations for even better performance
- Advanced routing to automatically select the best model for each task
- Cost optimization features to help you balance performance and budget
- Unified analytics across all three providers
#
Migration Made Easy
Already using OpenAI or Anthropic through Proxed? Switching to Google AI is trivial:
- Add a Google AI key to your account
- Update your project to use the new key
- Optionally adjust model selection
- Your existing code continues to work!
#
Start Building Today
Google AI support is available now for all Proxed.AI users. Whether you're building a new application or enhancing an existing one, Gemini models offer powerful capabilities with the security and simplicity you need.
Ready to get started? Check out our documentation for detailed integration guides, or jump right in and add your Google AI key to your account.
We can't wait to see what you build with Google AI and Proxed.AI!


 # Placeholder for an image of the new UI section